This post contains paid and/or affiliate links. I make a small commission at no extra cost to you. Please see our Privacy Policy.
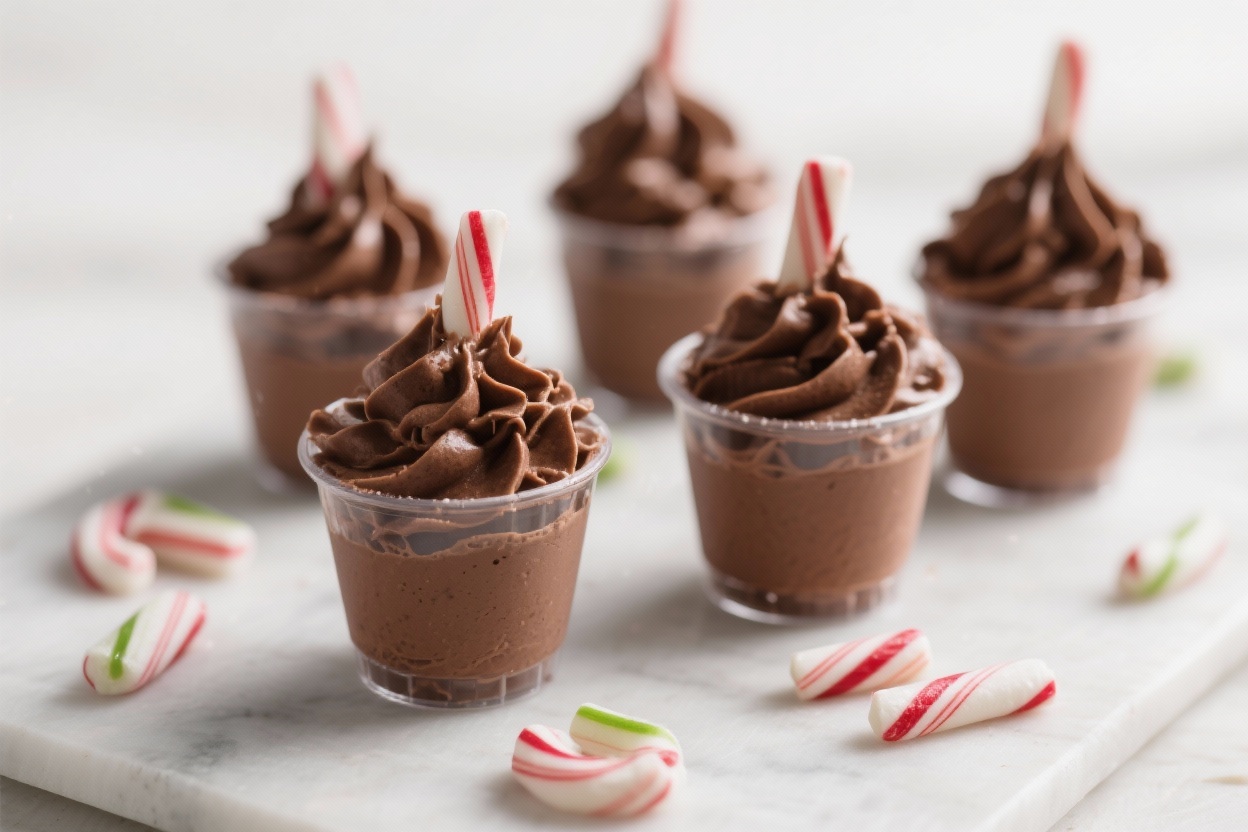
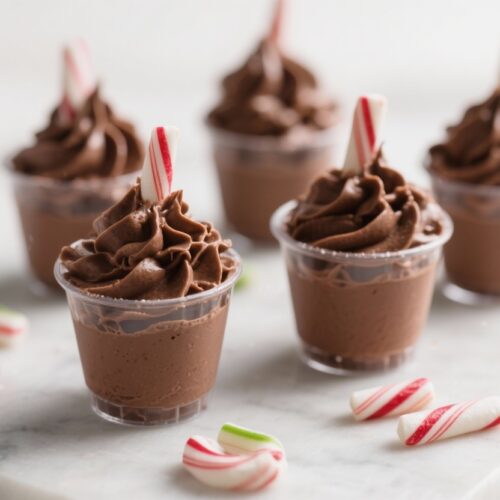
You know those desserts that make people stop mid-sentence and say, “Wait… who made this?” This is that dessert. Silky chocolate, cool peppermint, and a light-as-a-cloud texture served in cute little cups—yeah, it’s a flex. No baking.
Minimal dishes. Maximum applause. If you can melt chocolate and whip cream, you can look like a culinary genius.
Ready to ruin store-bought desserts for everyone? Good.
The Secret Behind This Recipe
The magic comes from the combo of three things: high-quality chocolate, controlled chilling, and just the right hit of peppermint. Too much mint tastes like toothpaste; too little and it’s “meh.” We use peppermint extract, not oil, for a balanced flavor that doesn’t punch you in the face.
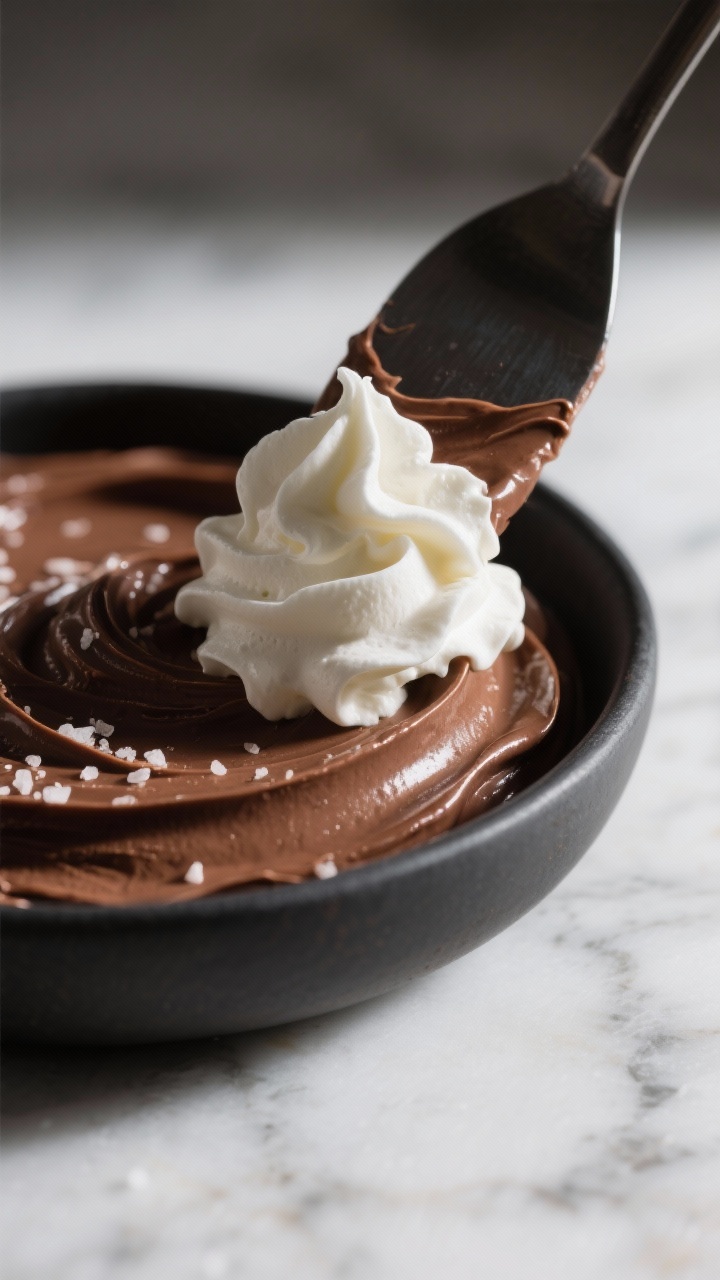
For that signature mousse texture, we fold whipped cream into a rich chocolate base stabilized with a touch of gelatin (optional but recommended). It keeps the mousse airy but scoopable, even after chilling. And yes, we add a pinch of salt—it wakes up the cocoa notes and makes everything pop.
Tiny effort, big ROI.
What You’ll Need (Ingredients)
- 6 oz (170 g) semi-sweet or dark chocolate, chopped (quality matters)
- 1 cup (240 ml) heavy cream, cold
- 1/3 cup (80 ml) heavy cream, warmed (for melting chocolate)
- 2 tablespoons granulated sugar (adjust to taste)
- 1 teaspoon vanilla extract
- 1/2 to 3/4 teaspoon peppermint extract (start small, taste, adjust)
- 1/8 teaspoon fine sea salt
- 1 teaspoon powdered gelatin + 1 tablespoon cold water (optional, for extra set)
- Whipped cream, for topping
- Crushed peppermint candies or candy canes, for garnish
- Chocolate shavings or mini chips (optional garnish)
- 8–10 mini cups, ramekins, or shot glasses (2–3 oz each)
Equipment
- Heatproof bowl – for melting the chocolate (either over simmering water or in the microwave).
- Small saucepan – to heat the cream gently for melting the chocolate.
- Mixing bowl – for whipping the cold cream.
- Electric hand mixer or stand mixer – to whip the cream to soft peaks (a whisk works too, but takes more effort).
- Rubber spatula – to gently fold the whipped cream into the chocolate mixture.
- Measuring cups and spoons – for accurate ingredient measurements.
- Serving cups or ramekins (8–10 mini cups, 2–3 oz each) – for portioning and chilling the mousse.
Optional helpful tools:
- Fine-mesh sieve (for straining if the chocolate mixture gets lumpy).
- Piping bag (to neatly fill cups).
- Microplane or grater (for chocolate shavings).
The Method – Instructions
- Bloom the gelatin (optional but pro move): Sprinkle gelatin over 1 tablespoon cold water. Let it sit 5 minutes until spongy.
- Warm the cream: Heat 1/3 cup cream until steaming (not boiling). Microwave 30–45 seconds or warm on the stove.
- Melt the chocolate: Place chopped chocolate in a heatproof bowl.
Pour hot cream over it. Let sit 1 minute, then stir until glossy and smooth. If using gelatin, melt it gently (5–10 seconds in the microwave) and whisk into the chocolate mixture.
- Flavor it: Stir in vanilla, peppermint extract (start with 1/2 teaspoon), sugar, and salt.
Taste and adjust mint and sweetness. The mixture should be slightly stronger than you want the final mousse—chilling mutes flavor.
- Cool to lukewarm: Let the chocolate base sit 5–10 minutes, stirring occasionally. You want it warm, not hot, so it doesn’t deflate the cream.
- Whip the cream: In a cold bowl, whip 1 cup heavy cream to soft peaks.
Don’t go to stiff peaks or folding will be a nightmare.
- Fold like a champ: Add one-third of the whipped cream to the chocolate base and whisk gently to lighten. Switch to a spatula and fold in the remaining cream in two additions until no streaks remain.
- Fill the cups: Spoon or pipe mousse into your cups. Smooth the tops or leave them swirly if you’re going for that artisan vibe.
- Chill: Cover lightly and refrigerate for at least 1–2 hours, or up to 24 hours, to set and develop flavor.
- Garnish and serve: Top with whipped cream, crushed peppermint, and chocolate shavings.
Serve cold. Accept compliments graciously (or don’t; your call).

Storage Tips
- Refrigerate: Keep covered in the fridge for up to 3 days. Add garnishes right before serving for crunch and color.
- Make-ahead: You can make the mousse base a day ahead and pipe into cups the day of.
Or assemble completely and chill overnight.
- Freezing: Freeze without whipped cream topping for up to 1 month. Thaw in the refrigerator overnight. Texture will be slightly firmer but still delicious.
- Transport: Use lidded cups or a cupcake carrier.
Keep cold with ice packs; mousse likes chill, not sauna.
Benefits of This Recipe
- Zero bake, high impact: Looks fancy, requires no oven. Your energy bill says thanks.
- Customizable sweetness: Adjust sugar and mint levels to taste. You’re the boss.
- Scales easily: Double or triple for parties without losing your mind—or your weekend.
- Kid and adult friendly: Candy cane crunch for the kids, elegant chocolate notes for the grown-ups.
Win-win.
- Holiday showstopper: Red-and-white garnish + glossy mousse = instant festive vibes.
Chocolate Peppermint Mousse Cups
Ingredients
- 6 oz 170 g semi-sweet or dark chocolate, chopped (quality matters)
- 1 cup 240 ml heavy cream, cold
- 1/3 cup 80 ml heavy cream, warmed (for melting chocolate)
- 2 tablespoons granulated sugar adjust to taste
- 1 teaspoon vanilla extract
- 1/2 to 3/4 teaspoon peppermint extract start small, taste, adjust
- 1/8 teaspoon fine sea salt
- 1 teaspoon powdered gelatin + 1 tablespoon cold water optional, for extra set
- Whipped cream for topping
- Crushed peppermint candies or candy canes for garnish
- Chocolate shavings or mini chips optional garnish
- 8 –10 mini cups ramekins, or shot glasses (2–3 oz each)
Instructions
- Bloom the gelatin (optional but pro move): Sprinkle gelatin over 1 tablespoon cold water. Let it sit 5 minutes until spongy.
- Warm the cream: Heat 1/3 cup cream until steaming (not boiling). Microwave 30–45 seconds or warm on the stove.
- Melt the chocolate: Place chopped chocolate in a heatproof bowl. Pour hot cream over it. Let sit 1 minute, then stir until glossy and smooth. If using gelatin, melt it gently (5–10 seconds in the microwave) and whisk it into the chocolate mixture.
- Flavor it: Stir in vanilla, peppermint extract (start with 1/2 teaspoon), sugar, and salt. Taste and adjust the mint and sweetness. The mixture should be slightly stronger than you want the final mousse—chilling mutes flavor.
- Cool to lukewarm: Let the chocolate base sit 5–10 minutes, stirring occasionally. You want it warm, not hot, so it doesn’t deflate the cream.
- Whip the cream: In a cold bowl, whip 1 cup heavy cream to soft peaks. Don’t go to stiff peaks or folding will be a nightmare.
- Fold like a champ: Add one-third of the whipped cream to the chocolate base and whisk gently to lighten. Switch to a spatula and fold in the remaining cream in two additions until no streaks remain.
- Fill the cups: Spoon or pipe mousse into your cups. Smooth the tops or leave them swirly if you’re going for that artisan vibe.
- Chill: Cover lightly and refrigerate for at least 1–2 hours, or up to 24 hours, to set and develop flavor.
- Garnish and serve: Top with whipped cream, crushed peppermint, and chocolate shavings. Serve cold. Accept compliments graciously (or don’t; your call).
Notes
🕒 Times
- Prep Time: ~20 minutes
- Cook Time: ~5 minutes (melting chocolate and warming cream)
- Chill Time: ~2 hours (to set properly)
- Total Time: ~2 hours 25 minutes
🍫 Nutrition (per serving)
(based on 10 small servings, without toppings)| Nutrient | Amount |
|---|---|
| Calories | ~240 kcal |
| Fat | ~20 g |
| Saturated Fat | ~12 g |
| Carbohydrates | ~14 g |
| Sugar | ~12 g |
| Protein | ~3 g |
| Sodium | ~50 mg |
| Fiber | ~1 g |
Note: Adding whipped cream, chocolate shavings, or peppermint candy garnish will slightly increase sugar and calorie content.
Common Mistakes to Avoid
- Over-minting: Peppermint extract is potent. Start with less, taste, then add. “Toothpaste mousse” is not a trend.
- Hot base + cold cream: Adding whipped cream to hot chocolate base melts it. Let the base cool to lukewarm first.
- Overwhipping cream: Stiff peaks make folding tough and lead to grainy texture.
Aim for soft peaks—billowy, not rigid.
- Skipping salt: That tiny pinch brings out the chocolate. Don’t skip the MVP.
- Using low-quality chocolate: If it doesn’t taste great as-is, it won’t taste great in mousse. Choose a brand you’d eat straight.
Variations You Can Try
- Mocha Peppermint: Add 1 teaspoon instant espresso powder to the hot cream before melting the chocolate.
Coffee + chocolate = unstoppable.
- White Chocolate Peppermint: Swap semi-sweet for white chocolate and reduce sugar to 1 tablespoon. Use 1/4 teaspoon peppermint to start—white chocolate is delicate.
- Crunch Layer: Add a base of crushed chocolate cookies or brownie bits in each cup before spooning in the mousse.
- Vegan Option: Use coconut cream (chilled, whipped) and a dairy-free dark chocolate. Sweeten with maple syrup, and skip gelatin or replace with agar-agar (follow package directions).
- Spiked Luxe: Stir in 1 tablespoon peppermint schnapps or crème de menthe to the chocolate base.
FYI: a little goes a long way.
- Garnish Glow-Up: Add pomegranate arils, gold sprinkles, or a tiny mint leaf for that “did a stylist make this?” finish.
FAQ
Can I make this without gelatin?
Yes. The mousse will still set from the chocolate and whipped cream structure. It’ll be slightly softer but totally spoonable.
What kind of chocolate works best?
Use 50–70% cocoa chocolate for balanced sweetness and depth.
Chips work in a pinch, but bars melt smoother and taste better.
How do I fix seized chocolate?
If your chocolate turns grainy or thick, whisk in a splash of warm cream, a teaspoon at a time, until smooth. Don’t panic—this is fixable.
Can I reduce the sugar?
Absolutely. The sugar is mainly for balance.
With semi-sweet chocolate, 1–2 tablespoons is usually enough; with dark chocolate, you might like the full 2 tablespoons.
How far ahead can I make these?
Up to 24 hours in advance is ideal for texture and flavor. Garnish just before serving so the peppermint crunch stays, well, crunchy.
Why did my mousse deflate?
Likely overmixing or adding whipped cream to a hot base. Fold gently and keep everything cool.
And remember, soft peaks are your friend.
Can I pipe the mousse?
Yes. Chill the mousse 15–20 minutes to slightly thicken, then pipe into cups for clean swirls. Pro tip: use a large star tip for drama.
Is peppermint extract the same as mint extract?
No.
Peppermint extract is stronger and cleaner in flavor. If using mint extract, start with even less and adjust to taste.
Wrapping Up
Chocolate Peppermint Mousse Cups deliver peak holiday flavor with minimal effort and maximum wow. They’re creamy, minty, and ridiculously elegant for something that takes minutes, not hours.
Keep the base recipe, tweak the mint and garnishes, and you’ve got a signature dessert on lock. Serve cold, smile smugly, and let the compliments roll in. IMO, this is the easiest win of the season.
This post contains paid and/or affiliate links. I make a small commission at no extra cost to you. Please see our Privacy Policy.
Printable Recipe Card
Want just the essential recipe details without scrolling through the article? Get our printable recipe card with just the ingredients and instructions.