
This post contains paid and/or affiliate links. I make a small commission at no extra cost to you. Please see our Privacy Policy.
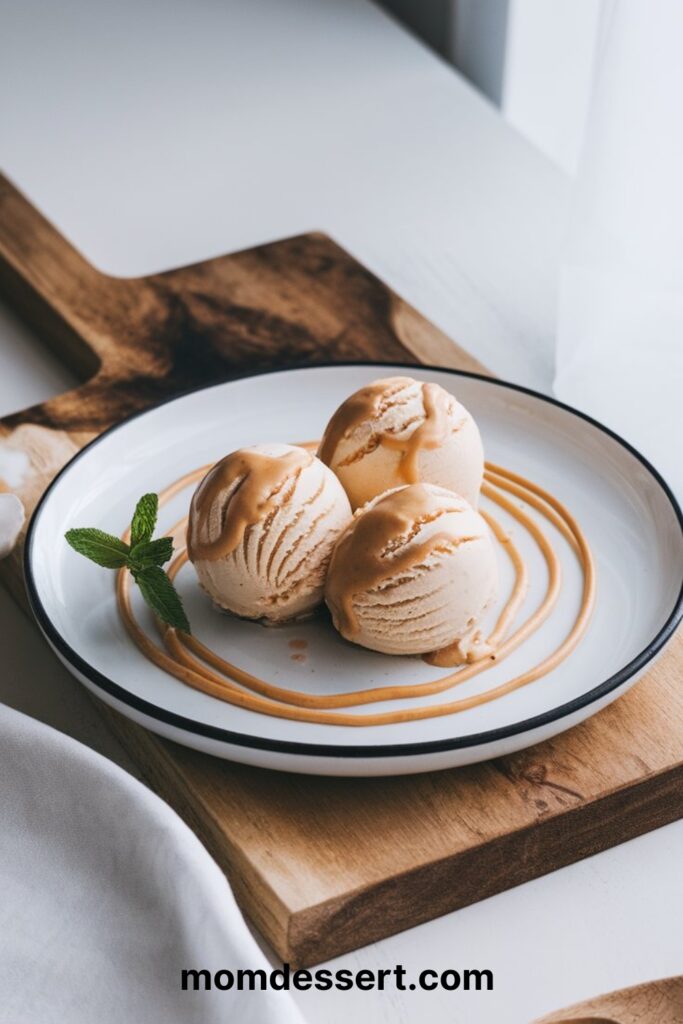
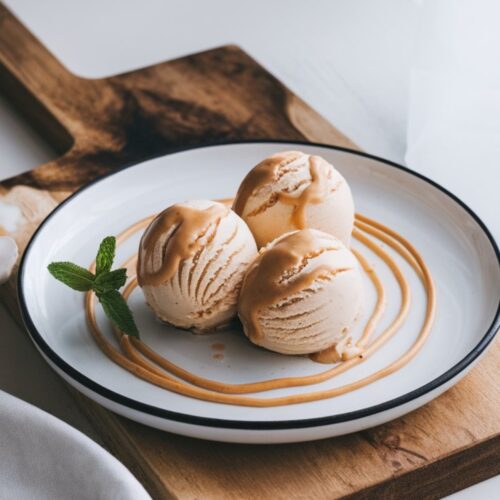
If you’ve ever stood in front of your freezer late at night, spoon in hand, craving something sweet, you know the magic of ice cream. Now imagine that ice cream is peanut butter flavored—rich, nutty, creamy, and with just the right amount of salty-sweet balance. That, my friend, is exactly what we’re making today: homemade peanut butter ice cream.
Whether you’re a die-hard peanut butter fan or simply looking for a new frozen treat to wow your friends and family, this recipe is going to hit the sweet spot (pun totally intended).
Best of all, you don’t need to be a pro pastry chef to pull it off. A few simple ingredients, a little patience, and—if you’ve got one—an ice cream maker will do the trick.
And here’s the fun part: this recipe is super flexible. You can keep it smooth and classic, swirl in some chocolate fudge, toss in chopped peanuts, or even crumble cookies into the mix. Peanut butter ice cream is like that best friend who’s always up for whatever.
So grab your mixing bowls, your favorite jar of peanut butter, and let’s get started.

Why Make Peanut Butter Ice Cream at Home?
You could, of course, grab a pint of peanut butter ice cream at the store, but homemade has a few undeniable perks:
- Customization: Want it extra peanut buttery? Done. Prefer it light and mild? Easy. Want to swirl in some jam for PB&J vibes? You’re the boss.
- Quality Control: You know exactly what’s going into it—no artificial fillers, no mystery ingredients.
- Cost Savings: Store-bought pints can be pricey. A homemade batch gives you a whole quart (or more!) for the same price.
- Bragging Rights: “Oh this? Yeah, I made it from scratch.” Instant culinary credibility.
Ingredients for Peanut Butter Ice Cream
Here’s what you’ll need for a classic, creamy batch:
- 1 cup creamy peanut butter (choose a smooth one for best texture; natural is fine, but stir it well)
- 3/4 cup granulated sugar
- 2 cups heavy cream
- 1 cup whole milk
- 1 teaspoon vanilla extract
- Pinch of salt (optional, but it enhances the flavor)
Optional Mix-ins:
- Chocolate chips or chunks
- Swirls of fudge or caramel
- Crushed cookies or graham crackers
- Chopped peanuts for crunch
Kitchen Tools You’ll Need
- A medium saucepan
- Whisk
- Mixing bowl
- Ice cream maker (preferred, but I’ll also share a no-churn option!)
- Airtight container for freezing
Directions: How to Make Peanut Butter Ice Cream
Alright, here’s the fun part. Follow along, and before you know it, you’ll be digging into your very own homemade pint.
Step 1: Warm Up the Base
In a medium saucepan, combine the milk, sugar, and peanut butter. Heat over medium-low, whisking gently until the sugar dissolves and the peanut butter melts smoothly into the milk. This step not only blends everything together but also creates that creamy foundation we’re after. Don’t let it boil—gentle heat is the goal.
Step 2: Add the Cream and Vanilla
Once your mixture looks silky, remove it from the heat. Stir in the heavy cream, vanilla extract, and a pinch of salt. The cream balances out the richness of the peanut butter, and the vanilla gives it that ice-cream-shop depth of flavor.
Step 3: Chill the Mixture
Here’s the hardest part: waiting. Transfer your peanut butter ice cream base into a bowl, cover it, and pop it into the fridge for at least 2 hours, or overnight if you can. The colder it is, the better it’ll churn. This step also gives the flavors time to mingle and deepen.
Step 4: Churn It Up
Pour the chilled mixture into your ice cream maker and churn according to the manufacturer’s instructions. Usually, this takes about 20–25 minutes. You’ll notice it thickening and transforming into soft-serve–like ice cream.
No Ice Cream Maker? No problem. Pour your chilled mixture into a freezer-safe container, and every 30 minutes, stir vigorously with a fork or hand mixer. Do this for about 2–3 hours until it reaches a scoopable texture. It takes a little more elbow grease, but the results are worth it.
Step 5: Add Mix-ins (Optional but Highly Recommended)
If you’re going for classic peanut butter ice cream, you’re good to go. But if you want to jazz things up, now’s the time to fold in chocolate chunks, cookie bits, or a swirl of caramel. Be gentle so you don’t over-mix.
Step 6: Freeze Until Firm
Transfer your ice cream into an airtight container and freeze for at least 4 hours (overnight is even better). This step ensures it sets properly and gets that perfect scoopable consistency.
Step 7: Scoop and Enjoy
Grab your favorite bowl (or cone, or mug, no judgment here) and dig in! Top it with hot fudge, a sprinkle of crushed peanuts, or just enjoy it as-is.
Tips for Perfect Peanut Butter Ice Cream
- Choose the Right Peanut Butter: Creamy works best. Chunky varieties can make the base grainy.
- Balance the Sweetness: If your peanut butter is already sweetened, reduce the sugar a bit. Taste as you go.
- Don’t Skip the Chill Time: Rushing the chilling process can affect texture and prevent proper churning.
- Use High-Fat Dairy: Whole milk and heavy cream give you that luscious, scoopable result. Skimping on fat makes ice cream icy instead of creamy.
- Experiment with Flavors: Try folding in raspberry jam for a PB&J ice cream or swirl in Nutella for a double nutty treat.
Variations to Try
One of the best things about homemade ice cream is how customizable it is. Once you’ve got the base recipe down, you can create endless variations:
- Peanut Butter & Chocolate Swirl: Drizzle in warm chocolate ganache during the last few minutes of churning.
- Peanut Butter & Banana: Fold in frozen banana slices or puree for a nostalgic combo.
- PB&J Ice Cream: Swirl in strawberry or raspberry jam for that classic sandwich flavor.
- Peanut Butter Cup Ice Cream: Chop up your favorite peanut butter cups and mix them in for ultimate indulgence.
Peanut Butter Ice Cream
Ingredients
- 1 cup creamy peanut butter choose a smooth one for best texture; natural is fine, but stir it well
- 3/4 cup granulated sugar
- 2 cups heavy cream
- 1 cup whole milk
- 1 teaspoon vanilla extract
- Pinch of salt optional, but it enhances the flavor
Optional Mix-ins:
- Chocolate chips or chunks
- Swirls of fudge or caramel
- Crushed cookies or graham crackers
- Chopped peanuts for crunch
Instructions
Directions: How to Make Peanut Butter Ice Cream
- Alright, here’s the fun part. Follow along, and before you know it, you’ll be digging into your very own homemade pint.
Step 1: Warm Up the Base
- In a medium saucepan, combine the milk, sugar, and peanut butter. Heat over medium-low, whisking gently until the sugar dissolves and the peanut butter melts smoothly into the milk. This step not only blends everything together but also creates that creamy foundation we’re after. Don’t let it boil—gentle heat is the goal.
Step 2: Add the Cream and Vanilla
- Once your mixture looks silky, remove it from the heat. Stir in the heavy cream, vanilla extract, and a pinch of salt. The cream balances out the richness of the peanut butter, and the vanilla gives it that ice-cream-shop depth of flavor.
Step 3: Chill the Mixture
- Here’s the hardest part: waiting. Transfer your peanut butter ice cream base into a bowl, cover it, and pop it into the fridge for at least 2 hours, or overnight if you can. The colder it is, the better it’ll churn. This step also gives the flavors time to mingle and deepen.
Step 4: Churn It Up
- Pour the chilled mixture into your ice cream maker and churn according to the manufacturer’s instructions. Usually, this takes about 20–25 minutes. You’ll notice it thickening and transforming into soft-serve–like ice cream.
- No Ice Cream Maker? No problem. Pour your chilled mixture into a freezer-safe container, and every 30 minutes, stir vigorously with a fork or hand mixer. Do this for about 2–3 hours until it reaches a scoopable texture. It takes a little more elbow grease, but the results are worth it.
Step 5: Add Mix-ins (Optional but Highly Recommended)
- If you’re going for classic peanut butter ice cream, you’re good to go. But if you want to jazz things up, now’s the time to fold in chocolate chunks, cookie bits, or a swirl of caramel. Be gentle so you don’t over-mix.
Step 6: Freeze Until Firm
- Transfer your ice cream into an airtight container and freeze for at least 4 hours (overnight is even better). This step ensures it sets properly and gets that perfect scoopable consistency.
Step 7: Scoop and Enjoy
- Grab your favorite bowl (or cone, or mug, no judgment here) and dig in! Top it with hot fudge, a sprinkle of crushed peanuts, or just enjoy it as-is.
Storing Your Homemade Peanut Butter Ice Cream
- Keep it in an airtight container to prevent freezer burn.
- Press a piece of plastic wrap directly onto the surface before sealing the lid.
- Stored properly, it’ll stay delicious for up to 2 weeks (though let’s be honest, it won’t last that long).
Serving Ideas
Peanut butter ice cream is so good it doesn’t need much dressing up, but if you’re in the mood to get fancy:
- Classic Sundae: Top with hot fudge, whipped cream, and chopped peanuts.
- Ice Cream Sandwiches: Spread it between two chocolate chip cookies for an out-of-this-world treat.
- Milkshake: Blend with milk and a drizzle of chocolate syrup.
- Breakfast Treat: (Don’t judge.) A scoop on top of warm waffles with sliced bananas.
Frequently Asked Questions
Can I make this dairy-free?
Absolutely! Swap the heavy cream and milk for coconut cream and almond milk. The flavor will be slightly different but still amazing.
Do I need an ice cream maker?
Nope. While it makes things easier, the no-churn method works fine—you just need to stir regularly while it freezes.
Can I use crunchy peanut butter?
Technically yes, but it won’t be as smooth. If you like little bits of peanuts throughout, go for it!
How do I prevent ice crystals?
Make sure your base is fully chilled before freezing and store the ice cream in a tightly sealed container. A splash of vodka (yes, really) can also help since alcohol doesn’t freeze.
Final Thoughts
There’s something magical about making your own ice cream. The process is simple, the ingredients are familiar, and the end result feels like pure luxury.
With this peanut butter ice cream recipe, you’re not just making dessert—you’re creating an experience.
From that first silky spoonful to the last creamy bite, it’s a treat that never gets old. So whether you’re serving it at a backyard barbecue, treating yourself after a long day, or just showing off your kitchen skills, this recipe is guaranteed to win hearts (and taste buds).
And trust me—once you’ve tasted homemade peanut butter ice cream, store-bought will never quite measure up.
So go ahead, grab that jar of peanut butter and let’s make some freezer magic happen.
This post contains paid and/or affiliate links. I make a small commission at no extra cost to you. Please see our Privacy Policy.
Printable Recipe Card
Want just the essential recipe details without scrolling through the article? Get our printable recipe card with just the ingredients and instructions.